Showing posts with label recipes: dessert. Show all posts

Thursday, February 21, 2013

Light, Fluffy and Oh, So Good!

 
     You are seeing a "theme" in my cooking style lately. It is all about eating healthy without giving up anything...like dessert! Valentine's Day we decided to avoid the crowds and have dinner at home. We had filets, salad and baked potatoes for dinner. I wanted to make something special for dessert and I found a recipe online from Taste of Home that was just perfect for us. I made a few minor adjustments and put it through a calorie counter. Each slice of 1/12th of the torte has 151 calories without whipping cream. I added 2 T. of Reddi Whip real whipping cream for an additional 15 calories.  
 
     Strawberry Schaum Torte
 
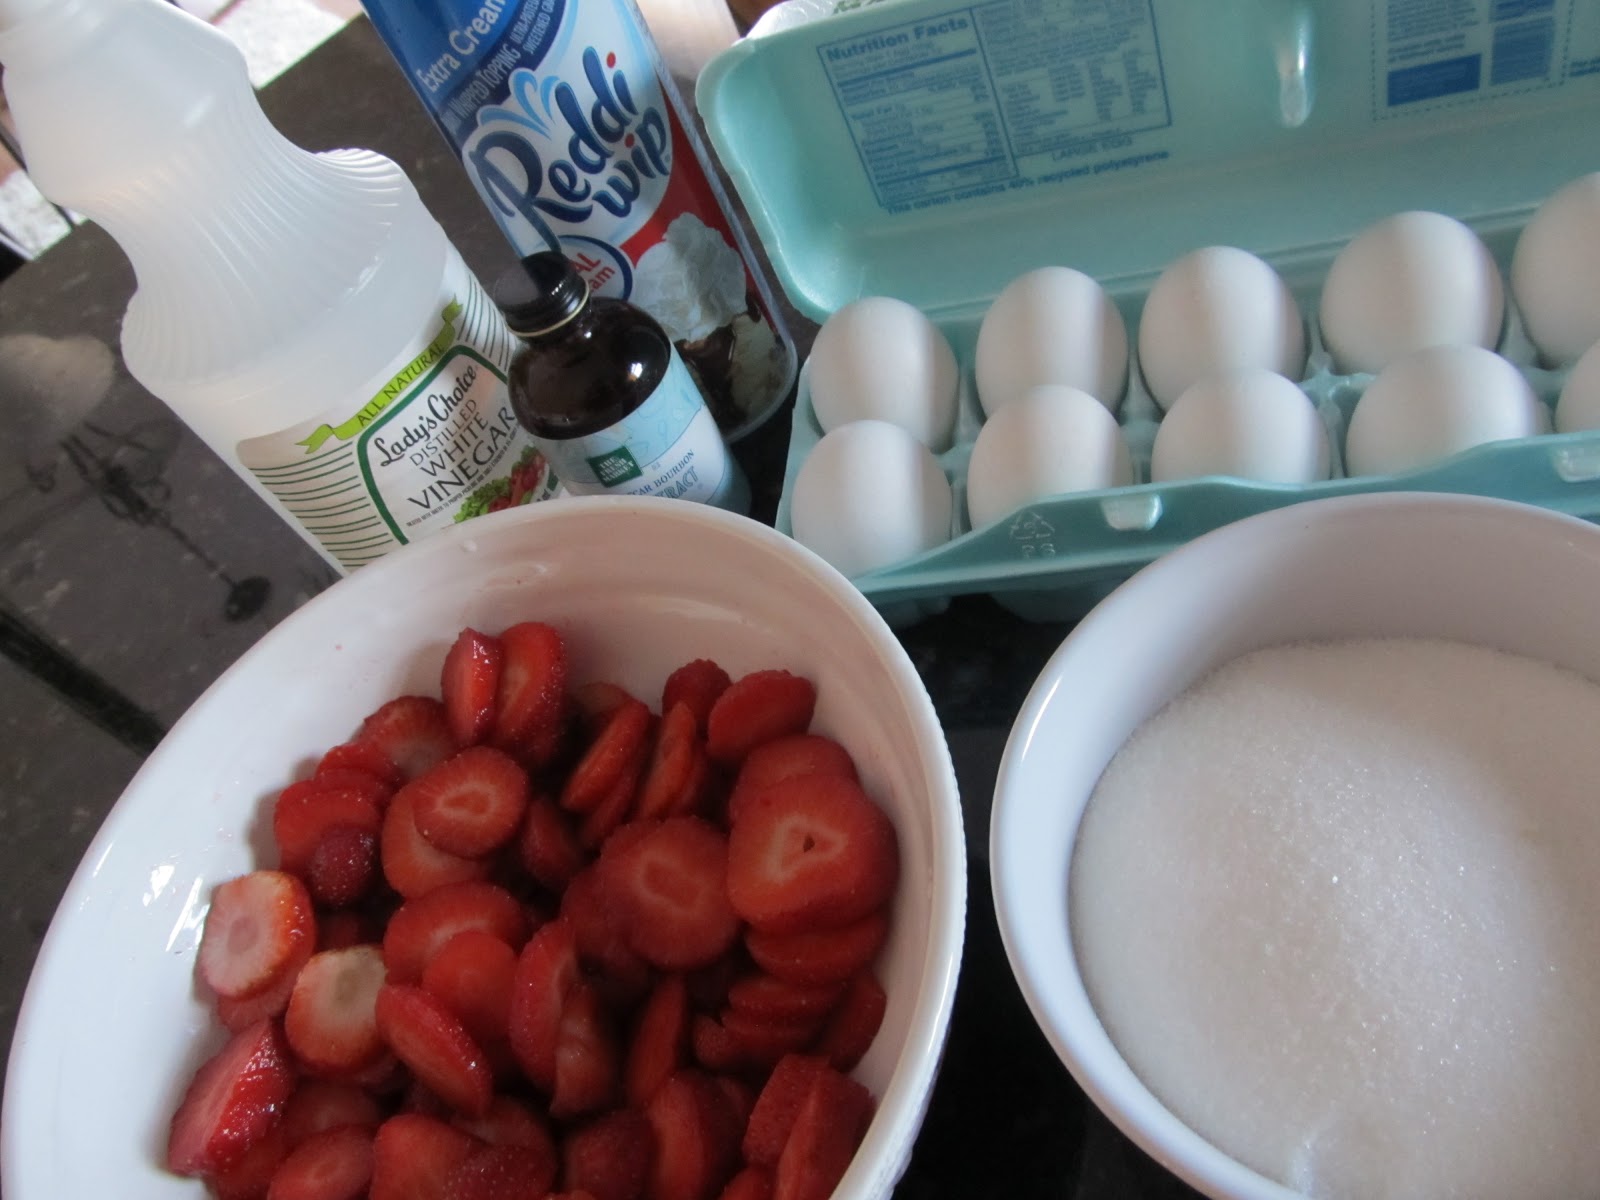
Ingredients:
8 egg whites
1 T. white vinegar
1 tsp. vanilla
1/4 tsp. salt
2 cups sugar
2 cups sliced strawberries
whipping cream (optional)
 
Preheat Oven to 300 degrees
Grease a 10 inch springform pan (I used Pam)
 
 
     Place egg whites in a bowl and let them stand 30 minutes to room temperature. Add the vinegar, vanilla and salt and beat until soft peaks form. Gradually add sugar and beat until glossy and stiff peaks have formed. Beat long enough for the sugar to be almost completely dissolved. See picture below.

 
Spread into the greased springform pan.
Bake at 300 degrees for 50-60 minutes or until lightly browned.
 
 
Remove from the oven and put on a wire rack to cool.
The meringue will come out of the oven very puffy and pretty.
 
 
Then it falls to smashed and ugly!
 
 
When cool, remove the sides from the
springform pan and place on serving plate.
 
 
     At this point, if you are serving a group...you could put the berries and whipped cream on the entire top of the torte. We were only using 2 slices, so I decorated each piece and put the rest in a container in the refrigerator. It was perfectly delicious for a couple of days after it was made. It is very light and soft. It was the perfect ending to our meal without making us feel stuffed.


     I'm often asked if we really use the tablescapes that I set. The truth is...not often. Last week I showed the table set for a Valentine brunch. That table wasn't used. The picture below shows how the table really looked for the two of us on Valentine's Day.
 
 
I am joining Susan @ Between Naps on the Porch for
Tablescape Thursday and
Michael @ Rattlebridge Farm for
Foodie Friday


Wednesday, July 18, 2012

Who Needs a Burger and Baked Beans Anyway?


     It was so hot here in Illinois on the 4th of July, that for the first time I can remember, we didn't grill outside. We use our grill all year long and I don't mind asking my husband to stand outside in the snow for a grilled chicken breast, but when the heat index is pushing 115-I just wanted him to stay inside. I decided to cook something completely not appropriate for the 4th and much more fattening than we usually have. According to my son, it was the best pasta he had ever eaten! No recipe...I was just "winging" it.


Ingredients:

Ground beef (turkey or chicken would be fine)
Pasta Sauce (1 jar or same amount of homemade)
Low Fat Ricotta Cheese
Penne Pasta (or whatever shape you like)
Shredded Mozzarella


     In a skillet, brown the ground beef (I only used half of what was shown raw above) and drain. Stir in the jar of pasta sauce. In a separate pan, prepare the pasta according to directions. We like a lot of sauce in our pasta dishes, so I only used about half the box of pasta. Drain the pasta and add to the meat/sauce mixture.


     We love ricotta cheese, so I used a large spoon and placed "globs" of it over the top of the pasta. It almost looked like I was cooking dumplings.


Cover the top of the pasta/ricotta
mixture with a package of mozzarella cheese.


     Put the lid on your skillet and on low heat let the cheeses melt. We had ours with a salad and crusty bread. It is very easy and oh, so good!


     This is the pasta sauce I used. I bought it at Walmart and it did cost more than all the other sauces, but it was excellent and worth the extra money.


For dessert, I tried to keep it more 4th of July friendly.
I made my typical trifle. You can find the recipe for it here.
It is low fat to offset the pasta dish!


     I'm still trying to get into the mood for blogging. This heat and drought seem to have fried my brain. I don't feel creative and while I'm trying to get around to visit everyone, I am still behind on my visits. We have a trip coming up soon, so I may never get caught up...but, I'm trying! It was 104 today, our yard is dead and our plants are mostly gone even though we have watered them. Our fish died in our fountain (I think they cooked) and the cornfield behind our house is truly sad to see. I really feel for the farmers, the loss is major and the worst they have seen in many decades. I feel as if we should be stocking up on corn products now before the prices go up! I hope there is rain where you live!
    

Friday, June 29, 2012

Lemon Pound Cake...easy and so good!


     When my dad was here I was trying to come up with a light dessert to serve after a big meal. I made this slightly lemon flavored pound cake (my first pound cake) and served it sliced with whipping cream and fresh blueberries. It would be good with any fruit, ice cream or even as a breakfast bread. I know it was a hit at our dinner table.


Ingredients:

Cake
1 stick butter, softened
1 1/2 cups sugar
3 large eggs (separate the yolks from the whites)
1 3/4 cup all purpose flour
1/4 tsp baking soda
2/3 cup sour cream
1 tsp real vanilla
1 T. fresh lemon juice

Glaze
3 heaping T of powdered sugar
juice from one lemon
Whisk together until blended

Preheat oven to 325 degrees


     Grease a 9x5 loaf pan. I prefer to sugar a pan after greasing rather than using flour. The sugar melts into the cake and not only doesn't show, it creates a little crispy crunch.


     With a mixer, beat the butter and sugar until light and fluffy (see top photo). Add the egg yolks one at a time, mixing after each addition. Mix the dry ingredients in a separate bowl. Add half of the dry ingredients to the butter mixture and mix, then half of sour cream, then the rest of the dry and the rest of the sour cream. When the batter is smooth, add the vanilla and lemon juice and mix well.


     In a separate bowl, beat the egg whites until stiff peaks form. Fold (with a spatula, don't beat) the egg whites into the batter until they are completely incorporated. Pour batter into prepared pan and bake until the cake is golden brown, 1 hour and 25 minutes. Let the cake cool and pour the glaze over the top.


     I forgot to take pictures after I plated the cake, but I simply put a large dollop of whipped cream on one corner of each slice and dropped a handfull of blueberries on top of the cream. The cake has more of a vanilla flavor with a hint of lemon. Enjoy!

I am joining Michael @ Rattlebridge Farm for Foodie Friday
Please visit our hostess!


Friday, April 13, 2012

Heavenly Torte, Almost


     My mom had a recipe that she made often for special occasions, including Easter. She called it Heavenly Torte and it basically is a meringue base with whipping cream and strawberries on top. I have her recipe, but I'd never made it. I planned to make it for Easter dinner, but when I saw that I had to make it one day and let it sit overnight in the oven before assembly the next day, I decided to make a variation of the same dessert.


Almost Heavenly Torte

6 egg whites
1/2 tsp. cream of tarter
1 1/2 tsp. real vanilla
1 1/2 T. cornstarch
1 1/2 cups white sugar
pinch salt

1/2 pint whipping cream

Fresh (or frozen) Strawberries, sliced and slightly sweetened

Preheat oven to 275 degrees
Line baking sheet with parchment paper


Mix cornstarch with sugar and set aside.


     In mixing bowl, beat egg whites, cream of tarter and salt until soft peaks form. Gradually add the sugar/cornstarch mixture, adding the vanilla after all the sugar is added. Continue to beat on high until stiff, glossy peaks form (see above picture). I actually used a hand mixer with no problems. It took about 3-4 minutes of beating to reach stiff peaks.


     With a large spoon, drop "globs" of the meringue onto the parchment paper, using the back of the spoon make a slight dent in the top. I made 8 large meringues using this recipe. Reduce oven temperature to 250 degrees and place the baking sheet on the center rack of the oven. Bake 50-55 minutes until shells appear firm, but not brown. Remove from parchment paper carefully to wire rack to cool. They will keep in a ziploc bag for a few days. They are soft and sticky on the inside.

     To serve: Whip the cream until stiff, do not add sugar. I placed a meringue on the plate, topped with the whipping cream and another meringue...then covered with berries. You can also do a single layer, filling the impression in the center with the whipping cream and adding strawberries to get 8 servings rather than 4.

     It tasted just like mom's overnight recipe and
was a light, sweet ending to a large meal.


I am joining Michael @ Rattlebridge Farm for Foodie Friday
Please stop in to say hello!


Tuesday, November 15, 2011

Christmas Preview, Perfect Pumpkin Recipe and Zoe Update


     I didn't really have any pictures to show of my current tabletops. I actually took down all of the fall pumpkins and "orangey" things on Sunday. I know it isn't even Thanksgiving yet, but as much as I love fall...I have a low tolerance for fall decorations. I enjoy them for a short period of time and I wanted some empty spaces before the holiday decorations go up. 


     This year is going to pose some interesting problems for us with decorating. Zoe is now 9 weeks old and everything is a chew toy to her. It dawned on me that we won't be able to have a tree that sits on the floor and certainly no presents within reach of those sharp puppy teeth. What to do, what to do? People say it is like having a new baby, it is worse. A baby this age stays where you put them! 


     I was lucky enough to find a silver tree at an auction. It looks like the old aluminum tree my grandmother had, but it isn't that old I'm sure. It isn't as tall of a tree as we are used to, so I think I can put it up on a table.


     I knew that I could go many directions using a silver tree and the ideas have been spinning in my head. Black and silver, gold and silver, deep purple? I'm showing you a few pictures of what I decided on. 


I won't decorate until after Thanksgiving. Hopefully, I can
make this pretty and "puppy safe" at the same time!


Pumpkin Cream Cheese Muffins

The recipe for these perfect muffins isn't mine. When I saw them posted by Monica @ Lick the Bowl Good, I knew I had to make them. You can find the recipe here.
    

     I will confess that when I got to the part in Monica's recipe that said to shape the cream cheese filling into a roll and chill it for 2 hours, I thought...nope, want them now! So, hers are much more perfect looking than mine. I simple put a blob of the cream cheese on top of the first half of the batter in the cup and topped with more batter (see below).


     I actually forgot to take a picture of the inside of the muffin until about 2 days after I made them. They were much prettier fresh from the oven. The picture will give you an idea of how my filling isn't as perfectly centered as Monica's. However, they tasted fantastic. I will be making these again!


     Zoe is growing. She had her first puppy checkup and weighed 4 pounds. She has figured out what to do outside (although on occasion she still does it inside). She slept through the night last night with no accidents! This is a big deal! I do seem to work my day around her right now, but I expected that. We still can't get her to stop chasing Nike. Nike is interested in her, from a distance. She doesn't like to be crashed into and jumped on, so we are really hoping that eventually we will be able to have them both free in the house without watching every second.


I am joining Yvonne @ StoneGable for On the Menu Monday 
(a little late)
Marty @ A Stroll Thru Life for Table Top Tuesday and
Kim @ Savvy Southern Style for Wow Us Wednesdays

Please visit our hostesses!


Friday, September 9, 2011

Simple and Delicious Custard Sauce


     I told you in yesterday's tablescape post that I would have the recipe today for the custard sauce I used on fresh fruit for dessert on Labor Day. This is a very simple recipe with few ingredients and it tastes very much like the best homemade ice cream, just not frozen and thicker! It is yummy enough to eat with a spoon and would be wonderful on pound cake, bread pudding or a chocolate cobbler.


Ingredients
1 cup half-and-half
1/2 cup white sugar, divided
1 tsp. vanilla (use real vanilla)
4 egg yolks
2 tablespoons butter

In a saucepan over medium heat, combine half-and-half and 1/4 cup sugar.


In a bowl, whisk together egg yolks and remaining 1/4 cup sugar until smooth.


     When cream mixture just begins to boil, remove from heat and whisk a small amount of hot cream into the egg yolk mixture, then pour egg yolk mixture back into remaining hot cream and whisk until smooth. Return the pan to medium heat and cook, stirring, until mixture coats the back of a spoon. DO NOT WALK AWAY. This mixture will curdle quickly. Remove from heat and stir in butter and vanilla. Serve warm or cold.


I used fresh strawberries, blueberries and pears and
 just drizzled the sauce over the top before serving.


I am joining Michael @ Designs by Gollum for Foodie Friday.
Please make sure to stop and say hello to her.