Showing posts with label wreath. Show all posts

Friday, December 6, 2013

It is Christmas Around the House

 
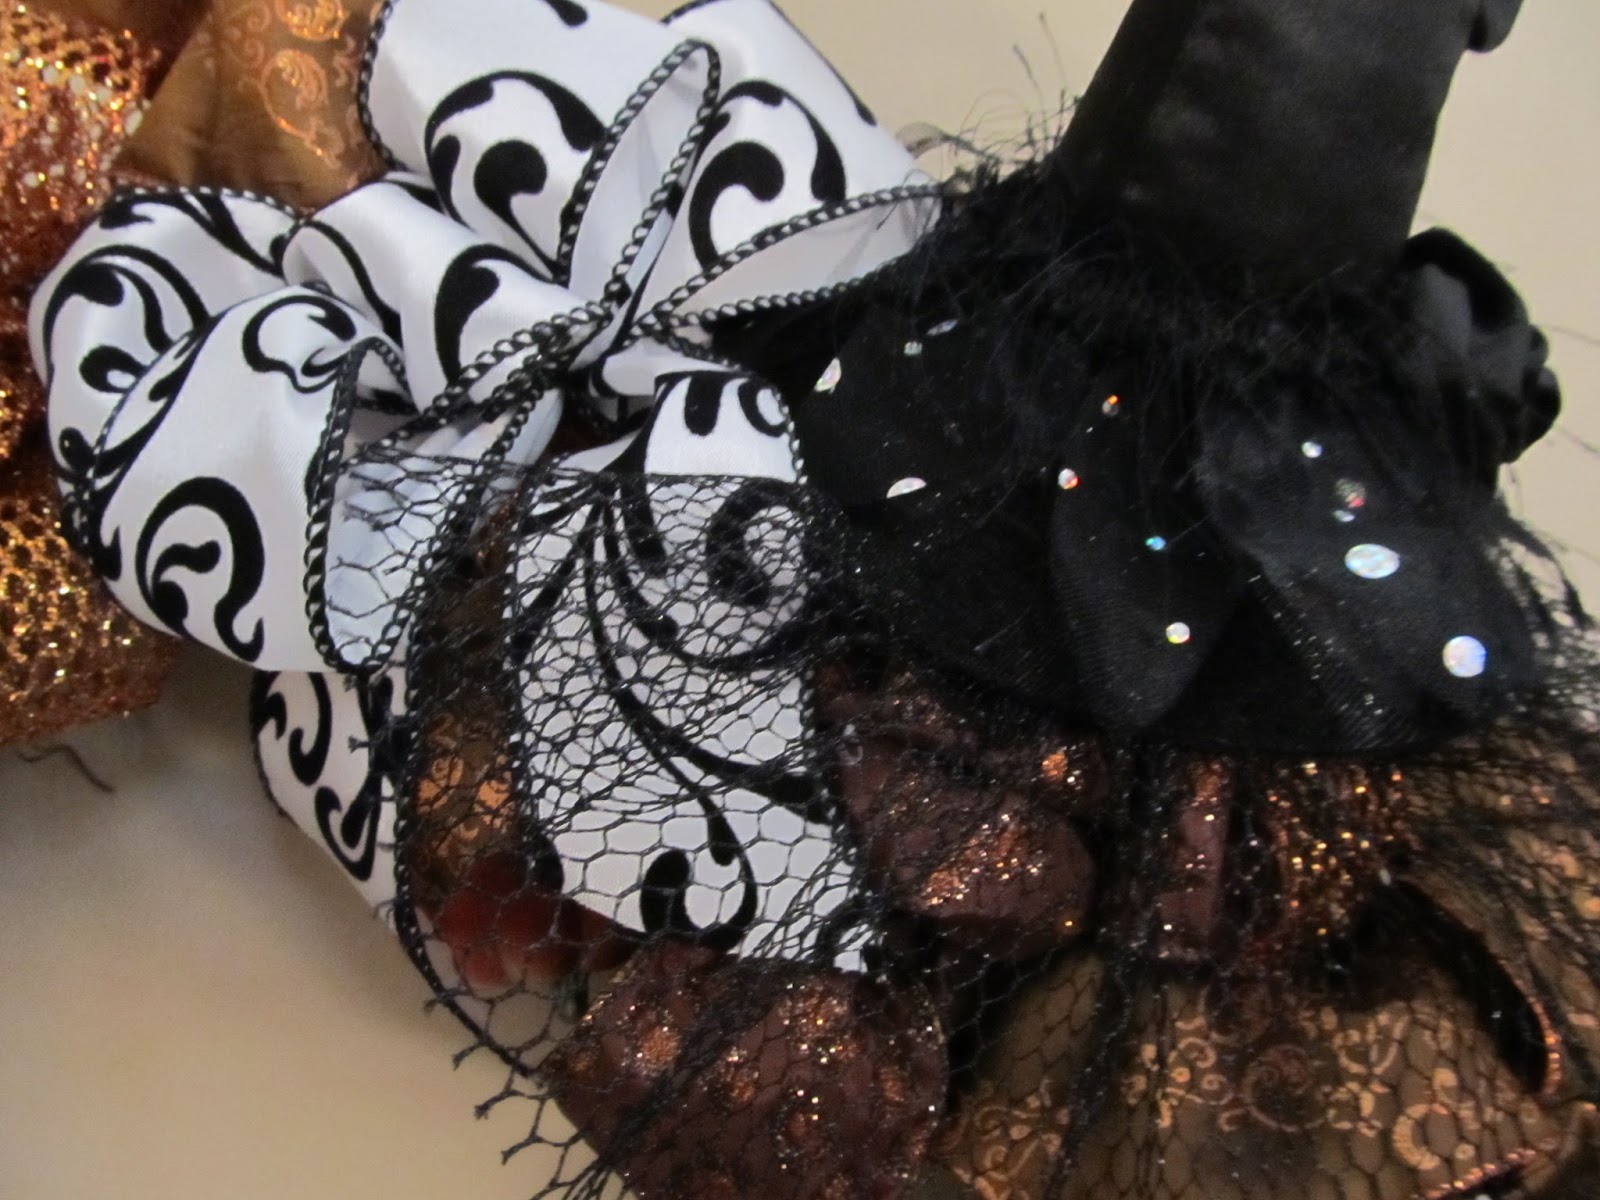
     You may remember the wreath I made for Halloween using ribbon. I wanted to see how it translated into a Christmas wreath and it was a fun project. A girlfriend came over and we had a craft day. She used burgundy and gold ribbons and it was really interesting to see how mine turned out whimsical and fun, while hers was elegant and classy. You can find the tutorial to make a ribbon wreath here. Use a variety of ribbon colors and textures for whatever holiday you are doing. I added two of my Annalee dolls for a little more fun.

 
Around the rest of the house...
 
 
A snowman tucked into my
twig wreath in the kitchen.

 
This year red is the color in my house,
 along with several snowmen and
quite a bit of "sparkle"!


Little hints of color to brighten the kitchen.

 
     One of my few new purchases, this sweet little wooden plaque with glittered stockings. I found this in St. Charles, MO for only $7.99 and it had to come home with me.

 
Snowballs in a bread bowl?


I think this is my favorite spot in the house this year.
 
 
     You can't have a Disney daughter without adding a bit of Disney Magic to the house. How many other women my age got Sven from the movie Frozen for their birthday?

 
Are you seeing a pattern?
Snow people, wildlife, red, silver and green.

 
     This sweet little snowman was another St. Charles purchase. I got him in a gallery, he is made of recycled products and this one is called Snowman Praying. Love.


     The hallway and guest bath have a bit of snow and also kept some seashells. The ornaments on the candlesticks are made of shells and if you look closely, you will see the starfish in the picture above. I love mixing all sorts of things around my house. There are no rules, just love the things you use!


     What I really wanted was a gorgeous holiday quilt set from Pottery Barn, what I got was my grandmother's Christmas quilt across the bottom of a plain white quilt. Much more practical and yet it still adds just a hint of Christmas to our bedroom. Just a little hint of holiday color can really make your house festive.
 
 
I hope you enjoyed your tour.
Come back soon!
 
 
     I was asked yesterday if I would review what looks to me to be a great gadget. I turn down a lot of requests to try merchandise, but this was something I would buy for myself if I had known it existed. I wanted to mention it here before I even get mine because I know many of you are still Christmas shopping and this looks like a great gift idea for almost everyone. The Powerocks Magicstick is a portable battery that keeps your cell phone powered on-the-go. You charge this colorful gadget with the included USB cable and then it fits in your purse (or pocket), and you can re-charge your phone while you are walking around the mall, or any other event. I can't wait for mine to get here so I can try it. I can't tell you how many times I am shopping for the day and my phone is down to almost no charge. I will be doing a review as soon as I get mine and try it out.


Wednesday, September 11, 2013

Getting Ready for Fall-Wreath Tutorial


     The seashells have been put away around my house and it is beginning to look more like fall. Of course, with temperatures pushing 100 degrees this week...I feel a little silly switching my things, but I was ready for a change. I won't put out Halloween things until October, but I did want to make a new indoor wreath for the season. I saw something in a catalog that I loved, but it was $359! I was inspired to make something that was equally as unique and I love the result...I always like things to be slightly "odd"!


     My goal, as always, was to use things I had at home and spend as little money as possible. I put a sheet on the living room floor and got busy stripping old flowers and ribbon off of a grapevine wreath. This wreath is approx. 25" in size. I also had 3 different fall ribbons and 3 different black and white ribbons for this project.
 
     To begin, make 6 or 7 bows (I made 2 loop bows, much smaller than a bow for a traditional wreath or package) of each of the fall colors. I also made 2 bows from each of the black and white spools of ribbon. You can see my bow tutorial in my sidebar. Just make 2 loops per side instead of the normal 3 or more.

 
     My first ribbon was a bronze/brown with a rust floral on it. Using the wire I made the bows with, I attached the bows randomly to the wreath.

 
     The second ribbon was a deep orange mesh, again added randomly on the wreath. You may notice that I haven't cut the tails on the bows at this time. I wasn't sure what I was going to do with them at this point. After all the bows were attached, I cut the tails (which were left about the same size as the bow loops).
 
 
     Someone in my house loves ribbon more than I do. After chasing her around and grabbing the bows from her, I moved her bed to my work area and she finally calmed down.

 
     The last of my fall ribbon was a deep chocolate brown with an animal print in rust. Once again, filling in the gaps left by the other bows, these were added. At this point, I hung the wreath on the wall and snipped the tails, fluffed the loops and made sure that most of the wreath was covered with bows.
 
 
     I added the various black and white bows into the mix (this is the odd part) and wired in a sparkly witches hat.

 
I also had a witch tassel that was just screaming
at me, "pick me, I want to be on the wreath too"!
 
 
A few random faux pumpkins were
tucked in for added texture and it is done!
 
 
     I love the fact that it isn't screaming orange and that while it has hints of Halloween, it can be up through all of the fall months. I also love that it isn't covered with faux fall flowers. I can't wait to try a similar technique at Christmas! I was thrilled with the result and only had to buy the black and white ribbons to create it, the rest I already had at home. What do you think? Too strange?
 
I will be joining Kim @ Savvy Southern Style
for Wow Us Wednesdays
Please make sure to visit the party!


Monday, March 11, 2013

The Wreath in my Blog Header-tutorial

 
     I have had several comments about the wreath in my blog header. I thought I would show you how it all came together. I don't really have a plan when I start one of these...I just know that I don't like things to be all "matchy, matchy" and so I put things on a wreath in a random way. For this fairly large wreath, I used 2 large hydrangea bushes (one blue, one green) that I took apart, separating the greenery from the blossom stems. I also used about a dozen white hydrangea blossoms. I used almost my entire bolt of blue burlap wired ribbon and about half of a larger bolt of green ribbon.

 
    I wanted to add a white birdhouse, but I didn't find one that was the right size...so, I bought the one above and pulled out my Annie Sloan paint and gave it a coat of white first and then trimmed the flower opening in a robin's egg blue.
 
 
     My first step is always to place some background greens on the wreath (an old wreath that I stripped the flowers and old glue off of). You will notice that the right side is an ivy and the left side has leaves...as I said, I don't like things to be symmetrical when it comes to florals...live ones or silk ones. After they are in place, I attach them with a glue gun.

 
     My next step was to add the white blossoms. I scattered them in singles and pairs around the wreath (and forgot to take a picture). The blue and green blossoms (some with leaves) were added next and then the glue gun was used to attach them. I didn't worry about spaces as I knew the ribbons would be filling in gaps.

 
     When using two colors of ribbon, I like to make my bow by using both colors, layered together as I make the loops. When the bow is complete, I simple pull the loops in opposite directions so that the colors mix together well and both colors show. You can see how to make a bow on one of my older posts-click here. Placing one large bow off to the side and letting the streamers go both up and down creates a more professional look. I always put a few "ruffles" in the streamers and touch the glue gun in a few random spots to hold them in place.


     Another "floral secret" is to cut a smaller piece of ribbon and pinch the middle to create a little insert. Touch the pinched point with the glue gun and insert one or more into the wreath.

 
     I actually had some sticks to add to come out the top, but I forgot to put them on the wreath. This hangs on a wall above our open stairway to the basement and I have to walk very carefully along a ledge with my husband behind me to catch me to hang it...I'm not taking it down and fixing it at this point! If you enlarge the picture, you can get a better idea of the random ribbon pieces that add that florist touch that you don't often think to do on a homemade wreath. Ribbon truly is the key to how a wreath turns out. You can make a beautiful wreath out of almost any greenery or flower, but don't skimp on your ribbon...use wired ribbon and lots of it!
 
 
I am joining Susan @ Between Naps on the Porch for Met Monday
Kim @ Savvy Southern Style for Wow Us Wednesday


Thursday, September 20, 2012

Here Comes Fall!

 
     Well, obviously it has been a little while since I have posted anything! Blogger has changed and this time I don't think we can go back to the "old" way of writing our blog posts. I guess I will get used to it, but at this moment...I'm a little lost!
 
     I've taken a bit of a blogging break. I have no excuse, just life getting to me and taking away my creativity. I can't exactly say that I'm suddenly inspired, but I am trying. Over the next few days I hope to catch up with those of you who have been inspired to write. 

 
      Fall is almost here and our temperatures reflect it. Today I actually opened the windows and turned off the air for most of the day. I'm gradually adding a few fall things around the house. I grabbed a wreath from last year and stripped everything off of it (see above).

 
     I really wanted a very full, thick wreath to hang over the stairway this year. I started layering every fall flower I had in my stash, along with a few leaves and twigs. My plan was to actually fill the center as well, but I ran out of flowers and I was determined to make this one out of only things I already had in the house. I'm using more burgandy and deep rust this year, with less orange.

 
Along with the cooler temperatures we have
been having some beautiful sky art.

 
     We enjoyed the 19th annual Corvette Funfest here last weekend. It is always fun to stroll around the grounds and see the cars, enjoy the food and listen to the music. There are Corvettes all over town and parked at Mid America Motorworks (the host of the event) as far as the eye can see.


     We also celebrated Zoe's first birthday! I bought her Paws dog ice cream (it isn't really ice cream) and a new toy. Within just a few minutes she had eaten the ice cream, thrown up and then chewed the toy to bits and we had to throw it away. So much for that celebration! She is calming down a bit in her old age. She still wants to chew on things, but she does drop them now when we look at her. She is absolutely spoiled rotten!


Autumn is a second spring when every leaf is a flower
Albert Camus