Showing posts with label recipes: bread. Show all posts

Monday, January 17, 2011

Easy No-Knead Crusty Bread


     Happy Monday! We finally had a weekend at home with no plans and it was really nice. My husband added some new lighting to the garage and I cooked and watched movies. On Saturday I made a savory stew that I will share with you for Foodie Friday. I thought it needed a crusty bread to go with it, so I sorted through my recipes and found one that I had jotted down sometime and had only called it "Easy Bread, No Kneading" For years I have made my breads using a bread maker to knead the dough, then removing it and doing the shaping myself. My breadmaker died several months ago and I haven't replaced it. It has been quite some time since I made bread without the help of a machine. This recipe was so simple anyone can do it and the best part...it took very little effort.

Easy, No-Knead Bread

3 cups lukewarm water
2 envelopes yeast (not rapid rise)
1 1/2 tsp. salt
1/2 cup rye flour
1/2 cup whole wheat flour
5 1/2 cups all-purpose flour

You will need to have out 2 baking sheets dusted with cornmeal to place the prepared loaves on to bake.


Mix the salt and yeast with the water in a large bowl.


     Mix in the remaining dry ingredients without kneading. The dough will be sticky and ugly. It was difficult for me to stop at this stage because I'm used to seeing bread dough in a more smooth state. But, I left it like this and covered it with a towel and allow to rest at room temperature for 2 hours.


     The dough does rise, although not as much as my white bread usually does. The dough can now be used or refrigerated and used for a few days. 


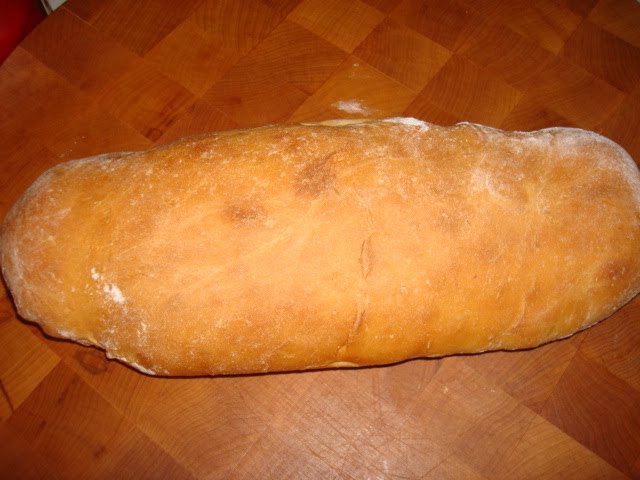
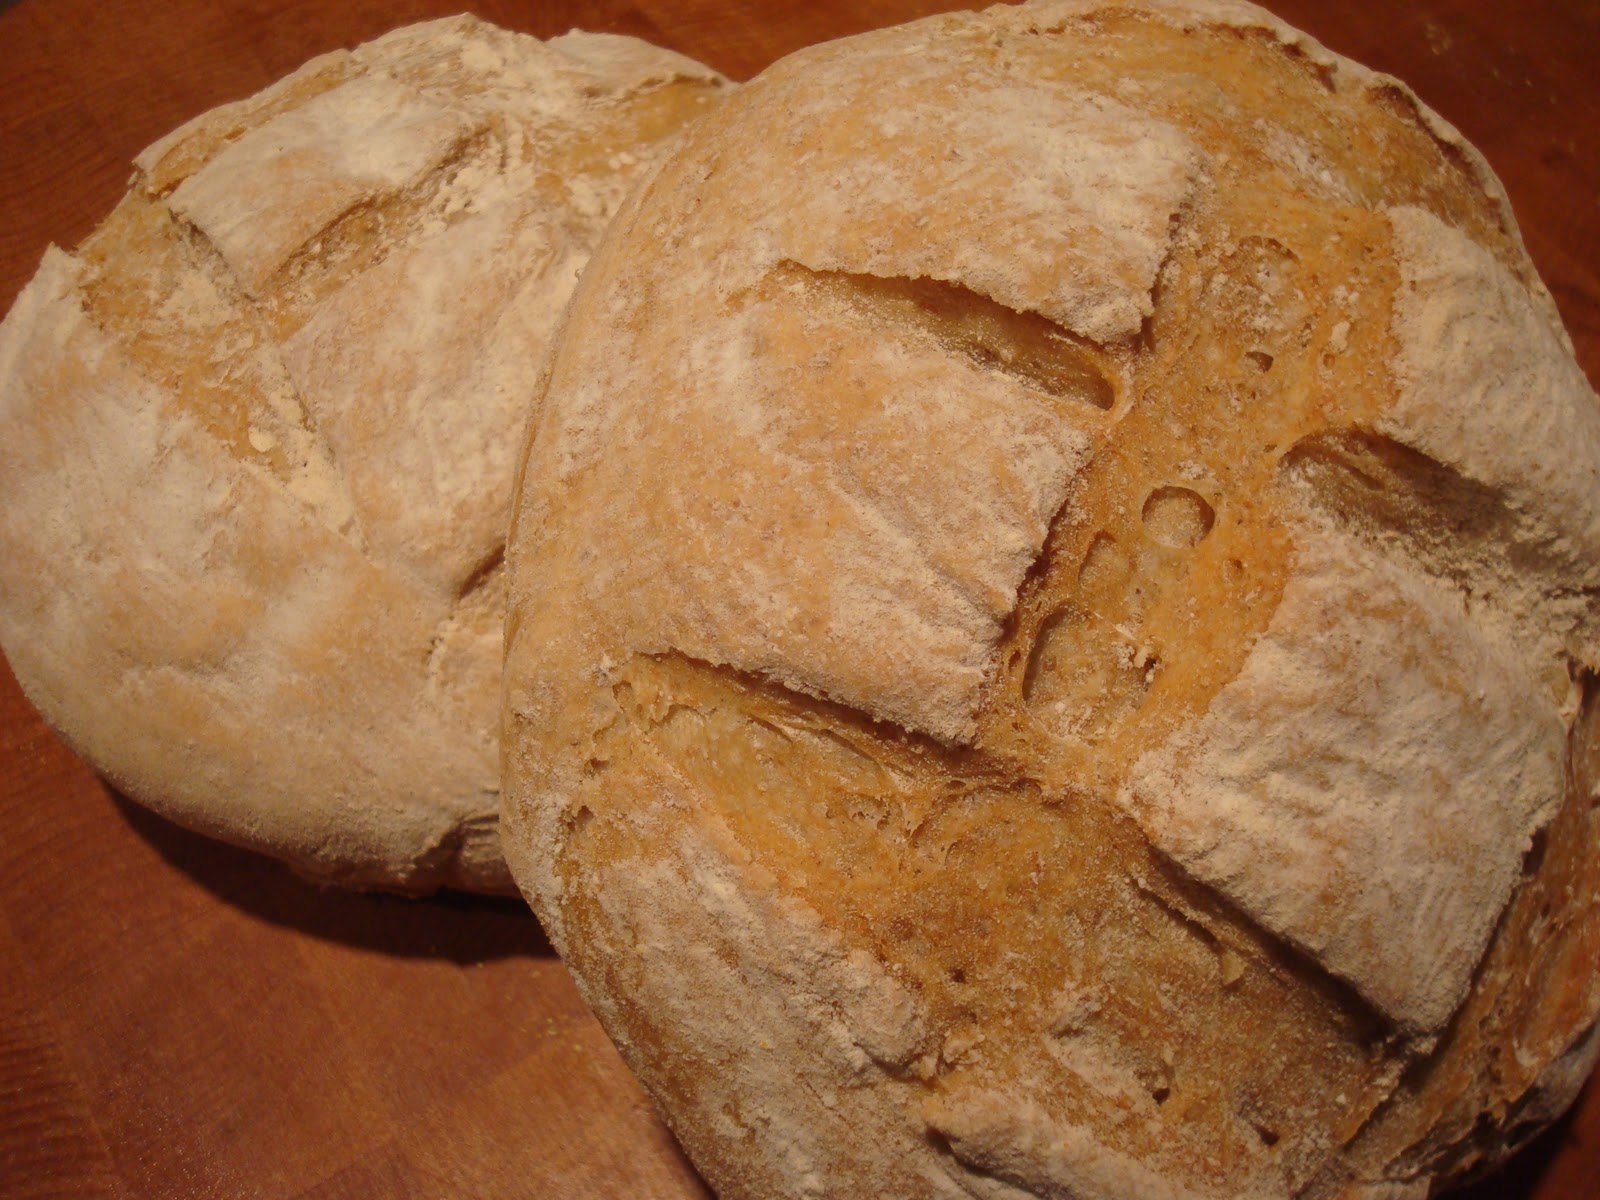
     At this point, divide the dough into quarters. Dust each piece with flour and quickly shape it into a ball by stretching the surface of the dough around the bottom on all four sides. Do not cut the slits into the bread yet! The loaves are small enough that you can place two of them on a standard baking sheet that has been sprinkled with cornmeal.  Cover once again with a towel and allow to rest for 45 minutes. While the dough is rising, heat the oven to 450 degrees and place an empty metal baking pan on the lowest rack in the oven. When the bread has rested 45 minutes and the oven is hot, sprinkle the loaf with flour and make a few 1/4 inch deep slashes on the top using a serated knife. Place the baking sheet into the oven. Pour 1 cup of hot tap water into the metal pan and close the oven and bake for about 35 minutes. The top should get a good hard crust and will be deeply browned. allow to cool on a cooling rack and brush off excess flour from the top of the loaf before slicing. 


     The bread turned out crusty on the outside and very tender on the inside. The four loaves are slightly larger than a "bread bowl" we often see used for soup. I may make it into 6 loaves next time and create my own bread bowls. I froze 2 loaves of the bread and I assume it will reheat well. This was so simple anyone can do it! It was also wonderful toasted for breakfast.


Note: My recipe said to put a casserole dish in the oven with the baking sheet and add hot tap water to it for when the bread was baking. I originally put in my Le Crueset casserole dish (which is good for 500 degrees) and added hot water to it when I was putting the bread in the oven. My Le Crueset immediately exploded. I have no idea why, it shouldn't have according to the information that comes with the pan. I then switched to another sided baking sheet and added the water to that. I don't want anyone else to lose a favorite pan, so I am recommending metal for the water.

Thursday, February 25, 2010

Would You Like A Scone With That Tea? Foodie Friday


The scone is a small British quickbread (or cake if recipe includes sugar) of Scottish origin. Scones are especially popular in the United Kingdom, Australia, New Zealand, Ireland, the United States, and Canada, but are eaten in many other countries. They are usually made of wheat, barley or oatmeal, with baking powder as a leavening agent. The scone is a basic component of the cream tea or Devonshire tea. (Wikipedia)

     I have been in the mood for scones. I've made several different recipes in the past few days and have come up with one that both my husband and I loved. Scones can be delicious, or they can be dry and tasteless. The recipe that we liked the best started with a recipe posted on allrecipes.com that I tweeked a bit to our taste. 


Ingredients:
1 3/4 cups all-purpose flour
1/4 cup white sugar
pinch salt
4 tsp. baking powder
5 T. unsalted butter
1/2 cup dried mixed berries (or any dried fruit you prefer)
1/2 cup milk
1/4 cup sour cream

1 egg beaten with 1 T. milk

Preheat the oven to 400 degrees

In a large bowl whisk together (or use a fork) the flour, sugar, baking powder and salt. Cut the butter into chunks and mix it in with the flour mixture until crumbly. Some people use a fork, some a pastry blender...I use my hands (very clean hands). The result will be dry and powdery with small pieces of butter through it. Add the dried fruit and toss with flour mixture.


In a bowl or the measuring cup, mix the sour cream with the 1/2 cup milk. Pour into dry mixture and stir just until blended.


The dough will still be a bit dry (not like cake batter).


Using a 1/2 cup measuring cup, scoop out dough and roll into a ball. Place on greased cookie sheet and slightly flatten. Brush with egg/milk mixture. Let sit for 10 minutes before putting them in the oven. Bake 15 minutes or until lightly browned. You can freeze these. They are best if you reheat them in the oven instead of the microwave, but I've done both. Don't they look good? A little butter and strawberry jam? Really, they are very good plain. Enjoy!


Please join Michael @ Designs by Gollum for Foodie Friday.
You will find the best recipes in all of Blogland!

Saturday, November 21, 2009

Easy, Cheap and Impressive...Do I Have Your Attention Yet?

I didn't do much cooking this week, so my blog has lacked in food ideas. It has been one of those weeks where I kept doing things that left me on a heating pad...and not standing in the kitchen. I can't even blame "old age" on my injuries...just being a klutz. Finally, last night I made one of my "regular" recipes.


Nothing makes a house smell as good as homemade bread baking. It also makes a great gift when someone moves in next door or you want to do something special for someone. It doesn't cost much to bake bread and yet anyone you give it to will be impressed. I have a simple recipe that I use all the time. The great thing about this dough is that you can make a loaf of bread with it, or individual rolls, cinnamon rolls or even a slightly sweet pizza crust. It all depends on how you shape it.

You can mix this dough in a bowl by hand (which I did for many years) or you can prepare it in a bread machine, which I do now. I just make it in the machine at the "dough" setting, then remove it and do the rest by hand. I don't like my bread to be in a square like the machine makes it. I do find that the machine dough is smoother than anything I ever accomplished by hand, but it certainly isn't necessary for it to taste great.

Ingredients:
1 cup warm water
1 T. olive oil
1 egg beaten with a fork
1 tsp. salt
6 1/2 Tablespoons honey
3 1/2 cups flour
2 tsp. yeast (1 packet as shown) don't use fast rising


Pre-heat the oven to 350 degrees

Place the ingredients in the bowl (or bread machine bowl) as listed, making a "well" in the flour for the yeast.


Either put the bread machine bowl into the bread machine and turn it on at the dough setting or mix the dough gently with a spatula, until well blended. Place on floured surface and knead the bread until smooth. The dough should look something like the picture below after you are done kneading it.


If you are using the machine, just let it run through the dough process and remove it at the end. Mine take 1 1/2 hours. If you are doing it by hand, once the dough is smooth, place it in a large bowl that has been coated with olive oil, flip it once so that all sides get a light coating of the oil. Cover with a clean dish towel and set it aside for 1 hour in the warmest part of your kitchen. It should rise to about double in size. Remove the dough from the bread machine or from the oiled bowl after it rises and place on floured surface.


This is when you will shape the bread however you want it. Last night, I just made loaves. I split the dough into 2 equal pieces and shaped out long loaves of bread. Place them on a greased and floured baking sheet, cover with a clean towel and let them rise again for about 30 minutes. Bake at 350 degrees for around 20 minutes, start checking the bread as soon as you can smell it. It should be golden brown.

For rolls, I pinch the large ball of dough into two pieces, then pinch those two pieces in half and then all four pieces in half. This will make  8 large rolls that can serve as buns. Cut them in half again for small dinner rolls. Place on greased and floured baking sheet, cover with a clean towel and let rise about 30 mintues. Bake them at 350 degrees for about 10-15 minutes depending on the size...watch closely.

For cinnamon rolls, roll the dough out into a large rectangle (about 12 x 8). Melt a stick of butter and pour it over the rectangle. Make a mixture of cinnamon and sugar (I don't measure, but you want the sugar mixture to cover the rectangle. Start with a cup of sugar and 2 tsp. of cinnamon, make more if you like them to be very gooey) sprinkle the sugar mixture over the top of the butter, add nuts if you like and roll them up jelly roll style so that you have a 12 inch roll when you are done. Slice them into I inch slices (you should get 12 rolls) and place cut side down in a greased 9x13 pan. Cover with a clean towel and let rise 30 minutes. Bake at 350 degrees for about 15 to 20 minutes until golden brown on the top. Frost with any buttercream frosting if you choose. Below is the dough after I shaped it into a loaf, before the 30 minute rising period.


Sometimes when you are making bread, it just doesn't work out. I made the above bread last night for us, very quickly. It turned out fine. Today I made another batch that I was going to give to someone. It didn't rise. I used a different brand of yeast (the store was out of my regular brand) so that may have been the problem. Sometimes yeast can be too old, never use it past the date...it won't work. Most of the time it turns out great, but I've been making this bread for 15 years and I still have some flops, so don't give up if you don't get it perfect the first time. Enjoy!

Friday, November 13, 2009

What Should I Do With These Bananas? Foodie Friday

     It is Foodie Friday and our hostess Michael @ Designs by Gollum is once again showcasing some of the best recipes you will ever see. Make sure to visit the other bloggers, but eat something first! It is sort of like grocery shopping, you don't want to go when you are hungry.


I don't know about you, but no matter how many bananas we buy, we always end up with at least 2 or 3 that are too ripe to eat. When that happens, I make this banana bread recipe. I can do it all in one bowl, very quickly and it always turns out great. The house will smell wonderful, your family will love you and you will only have a couple of items to clean up.

Ingredients:
2 or 3 very ripe bananas
1/3 cup vegetable oil
2/3 cup sugar
1 or 2 eggs (I generally use 2)
1 3/4 cup all purpose flour
2 1/4 tsp. baking powder
optional additions: approx. 1/2 cup nuts, dried fruit, chocolate chips, raisins...whatever you happen to have on hand.

Preheat the oven to 350 degrees.
Grease a standard size loaf pan

Mom hint: When I grease a pan for dessert breads or cakes, I spray them with Pam (or you can use a little butter) and add enough sugar to coat the entire pan. Shake out the excess. The sugar melts into the bread but also makes the removal from the pan very easy. It doesn't leave that ugly residue you get if you grease and flour a pan.

In a large bowl, mash the bananas with a fork. Add the oil, sugar and eggs and blend well using a wisk or a spatula.


Stir in the flour and baking powder and mix well. Stir in your optional ingredients if you want them. I like nuts in my banana bread, so on this day I used walnuts.


Pour the batter into your prepared pan. Bake for 1 hour (you might check it at about 50 minutes with a toothpick in the middle, some ovens are very hot and cook faster). Allow to cool for a few minutes before removing from pan. Take a knife around all of the edges first, then slowly flip the bread out of the pan. Cool and slice. Enjoy!