Showing posts with label floral design. Show all posts

Wednesday, September 11, 2013

Getting Ready for Fall-Wreath Tutorial


     The seashells have been put away around my house and it is beginning to look more like fall. Of course, with temperatures pushing 100 degrees this week...I feel a little silly switching my things, but I was ready for a change. I won't put out Halloween things until October, but I did want to make a new indoor wreath for the season. I saw something in a catalog that I loved, but it was $359! I was inspired to make something that was equally as unique and I love the result...I always like things to be slightly "odd"!


     My goal, as always, was to use things I had at home and spend as little money as possible. I put a sheet on the living room floor and got busy stripping old flowers and ribbon off of a grapevine wreath. This wreath is approx. 25" in size. I also had 3 different fall ribbons and 3 different black and white ribbons for this project.
 
     To begin, make 6 or 7 bows (I made 2 loop bows, much smaller than a bow for a traditional wreath or package) of each of the fall colors. I also made 2 bows from each of the black and white spools of ribbon. You can see my bow tutorial in my sidebar. Just make 2 loops per side instead of the normal 3 or more.

 
     My first ribbon was a bronze/brown with a rust floral on it. Using the wire I made the bows with, I attached the bows randomly to the wreath.

 
     The second ribbon was a deep orange mesh, again added randomly on the wreath. You may notice that I haven't cut the tails on the bows at this time. I wasn't sure what I was going to do with them at this point. After all the bows were attached, I cut the tails (which were left about the same size as the bow loops).
 
 
     Someone in my house loves ribbon more than I do. After chasing her around and grabbing the bows from her, I moved her bed to my work area and she finally calmed down.

 
     The last of my fall ribbon was a deep chocolate brown with an animal print in rust. Once again, filling in the gaps left by the other bows, these were added. At this point, I hung the wreath on the wall and snipped the tails, fluffed the loops and made sure that most of the wreath was covered with bows.
 
 
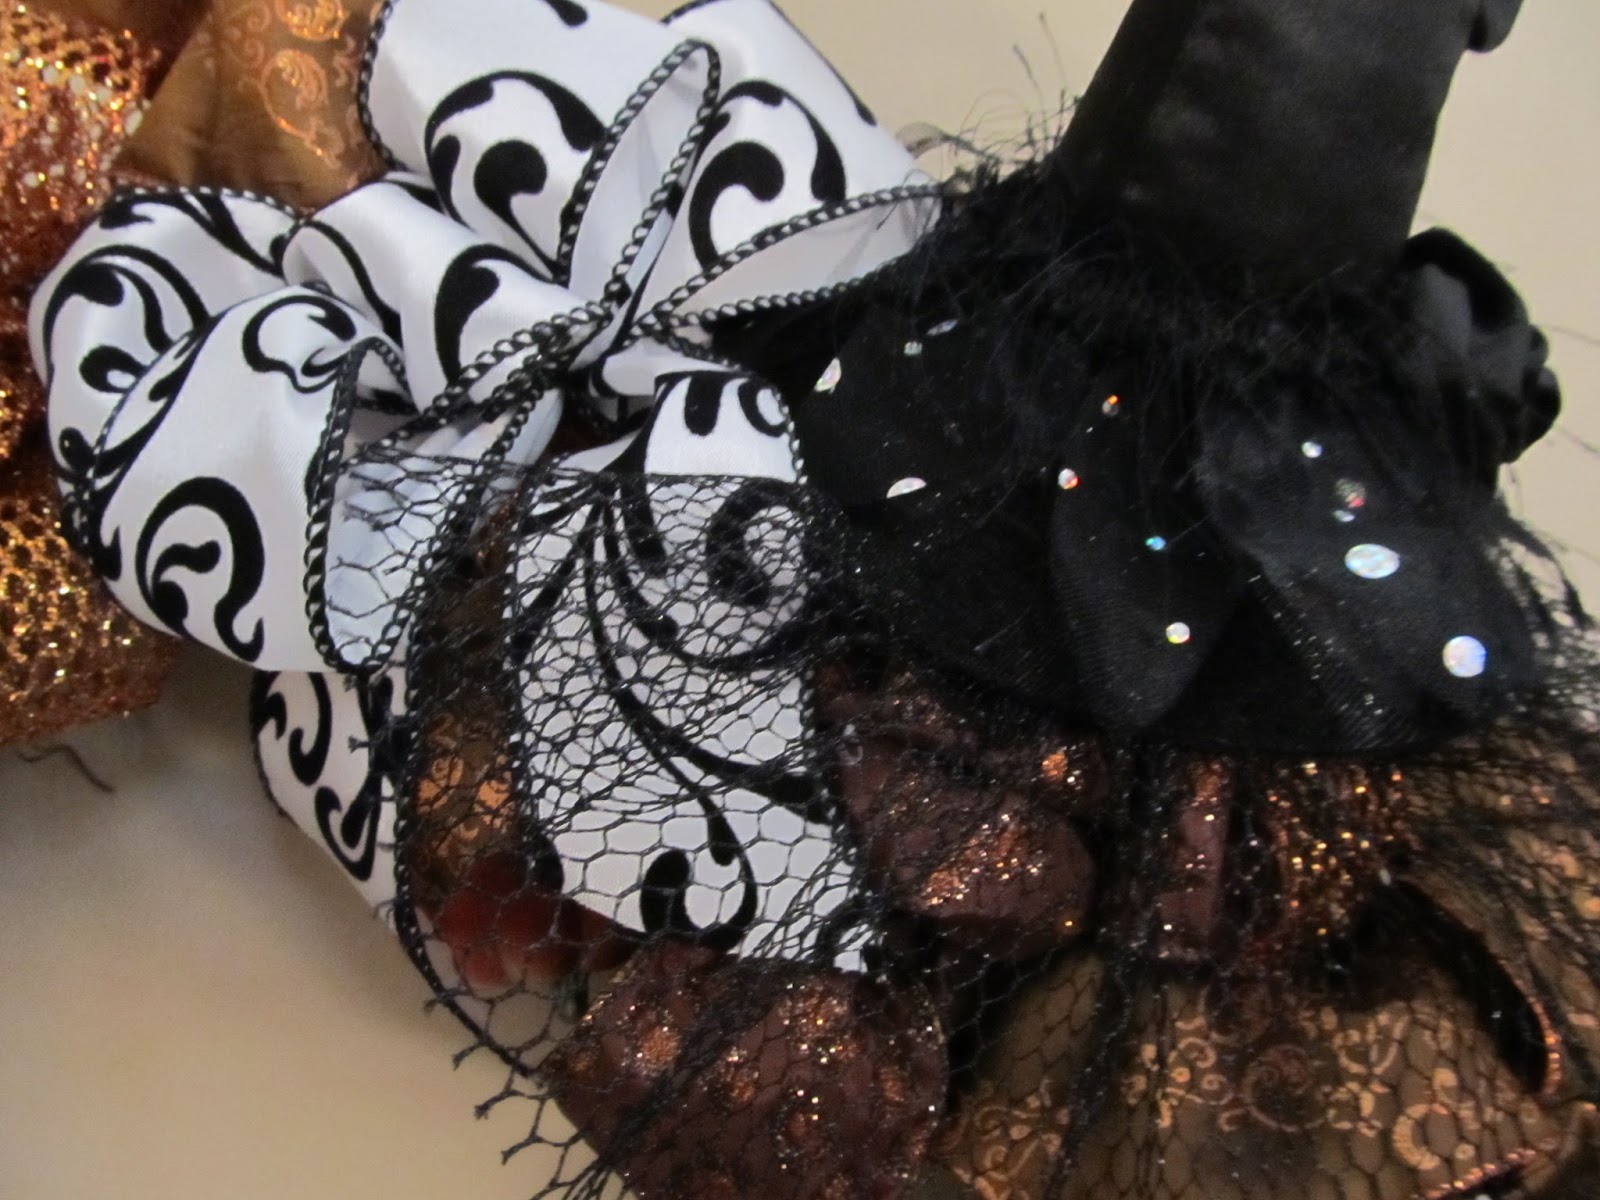
     I added the various black and white bows into the mix (this is the odd part) and wired in a sparkly witches hat.

 
I also had a witch tassel that was just screaming
at me, "pick me, I want to be on the wreath too"!
 
 
A few random faux pumpkins were
tucked in for added texture and it is done!
 
 
     I love the fact that it isn't screaming orange and that while it has hints of Halloween, it can be up through all of the fall months. I also love that it isn't covered with faux fall flowers. I can't wait to try a similar technique at Christmas! I was thrilled with the result and only had to buy the black and white ribbons to create it, the rest I already had at home. What do you think? Too strange?
 
I will be joining Kim @ Savvy Southern Style
for Wow Us Wednesdays
Please make sure to visit the party!


Monday, March 11, 2013

The Wreath in my Blog Header-tutorial

 
     I have had several comments about the wreath in my blog header. I thought I would show you how it all came together. I don't really have a plan when I start one of these...I just know that I don't like things to be all "matchy, matchy" and so I put things on a wreath in a random way. For this fairly large wreath, I used 2 large hydrangea bushes (one blue, one green) that I took apart, separating the greenery from the blossom stems. I also used about a dozen white hydrangea blossoms. I used almost my entire bolt of blue burlap wired ribbon and about half of a larger bolt of green ribbon.

 
    I wanted to add a white birdhouse, but I didn't find one that was the right size...so, I bought the one above and pulled out my Annie Sloan paint and gave it a coat of white first and then trimmed the flower opening in a robin's egg blue.
 
 
     My first step is always to place some background greens on the wreath (an old wreath that I stripped the flowers and old glue off of). You will notice that the right side is an ivy and the left side has leaves...as I said, I don't like things to be symmetrical when it comes to florals...live ones or silk ones. After they are in place, I attach them with a glue gun.

 
     My next step was to add the white blossoms. I scattered them in singles and pairs around the wreath (and forgot to take a picture). The blue and green blossoms (some with leaves) were added next and then the glue gun was used to attach them. I didn't worry about spaces as I knew the ribbons would be filling in gaps.

 
     When using two colors of ribbon, I like to make my bow by using both colors, layered together as I make the loops. When the bow is complete, I simple pull the loops in opposite directions so that the colors mix together well and both colors show. You can see how to make a bow on one of my older posts-click here. Placing one large bow off to the side and letting the streamers go both up and down creates a more professional look. I always put a few "ruffles" in the streamers and touch the glue gun in a few random spots to hold them in place.


     Another "floral secret" is to cut a smaller piece of ribbon and pinch the middle to create a little insert. Touch the pinched point with the glue gun and insert one or more into the wreath.

 
     I actually had some sticks to add to come out the top, but I forgot to put them on the wreath. This hangs on a wall above our open stairway to the basement and I have to walk very carefully along a ledge with my husband behind me to catch me to hang it...I'm not taking it down and fixing it at this point! If you enlarge the picture, you can get a better idea of the random ribbon pieces that add that florist touch that you don't often think to do on a homemade wreath. Ribbon truly is the key to how a wreath turns out. You can make a beautiful wreath out of almost any greenery or flower, but don't skimp on your ribbon...use wired ribbon and lots of it!
 
 
I am joining Susan @ Between Naps on the Porch for Met Monday
Kim @ Savvy Southern Style for Wow Us Wednesday