Showing posts with label recipes: main dish. Show all posts

Wednesday, October 23, 2013

Put Away The "Store Bought" BBQ Sauce, Pulled Pork

 
     We love a good pulled pork sandwich. I doubt that I ever make mine the same way twice. It is really hard to "mess up" pulled pork as long as you start with a good quality pork roast and let it cook until it is falling apart tender. I always try to make extra because this is something that freezes well.
 
     The last time I made pulled pork, I changed it up a little bit. I couldn't find a large boneless pork roast, so I bought three small ones.
 
Rub Ingredients:
4 T. paprika
3 T. sugar
2 tsp. onion powder
salt and pepper (about 1 tsp. of each)
 
Mix together and reserve 1 T. of the mixture. Pat the remaining rub onto the meat. You can do this step several hours ahead of time, but I never think that far in advance. I rubbed it into about 6 pounds of lean pork roast. I got out my grandmother's roaster and put a little oil in the bottom and slightly browned both sides of the meat on top of the stove to add flavor and get the rub to "stick". Add enough water to the pan to have it about 1-2 inches deep and put the roaster covered into the oven at 300 degrees for several hours. You want to slow cook this until it is falling apart tender.
 
 
In a saucepan, mix together the ingredients for the BBQ sauce.
 
BBQ Sauce Ingredients:
2 cups ketchup
1/4 cup brown sugar
1/4 cup white sugar
1 1/2 tsp. dry mustard
1 1/2 tsp. onion powder
1 tsp. fresh ground pepper
2 T. fresh lemon juice
2 T. Worcestershire sauce
1/2 cup apple cider vinegar
reserved 1 T. of rub mixture
2 T. maple syrup (I used real maple syrup)
1 cup of water
 
Mix all the ingredients for the sauce together and bring to a boil, reduce heat and simmer for 2 hours while the pork is cooking in the oven. Set aside.

 
When your pork is done, remove it from
the oven and using 2 forks, shred it.

 
Pour the BBQ sauce over the shredded pork and
put it back in the oven for another 30 minutes
(not necessary but makes it soak in better).

 
To serve: We love Pretzel Buns, but any crusty bun
will work. I topped ours with a scoop of coleslaw
 for added crunch. Coleslaw recipe.

 
     You could easily prepare the BBQ sauce ahead of time and cook your meat in the crockpot all day. Shred the meat and add the sauce for the last 30 minutes. Some people prefer their pork plain and the sauce served on the side, that works too!
 
 
I am joining Michael @ Rattlebridge Farm
for Foodie Friday

Wednesday, August 7, 2013

I Finally Cooked Something!

 
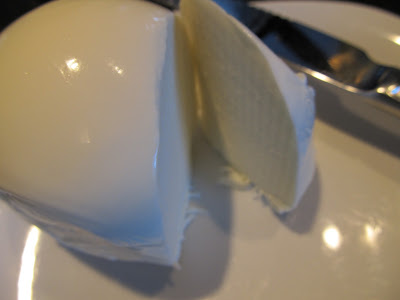
     It isn't all that often that my husband actually requests me to make a recipe. So, when he goes to the trouble to actually cut out a recipe and ask me to make it, how could I say no? He found the recipe in the Wall Street Journal and thought it looked good and also healthy enough to fit in with the way we eat these days (most of the time). I did have to "tweek" the recipe a bit based on what I had and what was available in small town Illinois. The actual recipe was called Grilled Shrimp with Watermelon, Basil, Corn and Burrata. Of course I had no idea what Burrata was and when I did figure it out, I knew that I wouldn't find it in my little town. I did find that a good substitute for Burrata is Fresh Mozzarella Cheese. Burrata is an Italian fresh cheese that oozes with cream in the center. Doesn't that sound good? I guess the texture on the outside is very much like fresh mozzarella, but it has a gooey, creamy center.
 
Grilled Shrimp with Watermelon, Basil, Corn and Mozzarella
 
1 pound large shrimp, peeled and deveined
3 1/2 T. olive oil, plus a little extra for drizzling
2 tsp. minced garlic (I left out, we don't like it)
4 T. finely sliced fresh basil
salt and pepper
kernels from 4 ears of corn
1 1/2 T. balsamic vinegar (aged balsamic is worth the extra cost)
3 cups cubed watermelon
1 ball of fresh mozzarella, quartered

 
Toss the shrimp (raw) with 2 T. of the oil, the (optional) garlic,
and 1 T. of the basil along with the salt and pepper. Set aside.
 
     I didn't peel and devein my shrimp until after they were grilled, because they were frozen. Next time I would buy raw shrimp that were already peeled.

 
     The recipe did not call for the corn to be blanched, but I did mine. I didn't want it to be raw. I simply dropped it into boiling water for just a minute or so. Remove the corn, dry and cut the kernels off the ears. Let the corn cool a few minutes before mixing with other ingredients.
 
 
In a large bowl, mix the watermelon with
the remaining basil, remaining oil and vinegar.
 
 
Toss in the corn kernels.

 
Slice the cheese into 4 pieces and set aside until serving.
 
     Grill the shrimp over medium-high heat until pink (1-2 minutes per side). After making this, I decided that while the grilled shrimp does add some color and extra flavor...once the ingredients are tossed together, you can't tell as much that the shrimp was grilled. I think this would be almost as good if you simply added boiled shrimp.

 
     Add the shrimp to the watermelon and corn mixture. To serve, divide the salad onto 4 plates and place a hunk of cheese next to it. Sprinkle the cheese with salt and drizzle with olive oil.

 
Here is the picture from the Wall Street Journal.
I think mine turned out looking similar.
 
It is a delicious, fresh summer dish that I will
be making again soon!
 
I am joining Kim @ Savvy Southern Style for
Wow Us Wednesdays
and
I will be joining Michael @ Rattlebridge Farm for
Foodie Friday

Wednesday, July 18, 2012

Who Needs a Burger and Baked Beans Anyway?


     It was so hot here in Illinois on the 4th of July, that for the first time I can remember, we didn't grill outside. We use our grill all year long and I don't mind asking my husband to stand outside in the snow for a grilled chicken breast, but when the heat index is pushing 115-I just wanted him to stay inside. I decided to cook something completely not appropriate for the 4th and much more fattening than we usually have. According to my son, it was the best pasta he had ever eaten! No recipe...I was just "winging" it.


Ingredients:

Ground beef (turkey or chicken would be fine)
Pasta Sauce (1 jar or same amount of homemade)
Low Fat Ricotta Cheese
Penne Pasta (or whatever shape you like)
Shredded Mozzarella


     In a skillet, brown the ground beef (I only used half of what was shown raw above) and drain. Stir in the jar of pasta sauce. In a separate pan, prepare the pasta according to directions. We like a lot of sauce in our pasta dishes, so I only used about half the box of pasta. Drain the pasta and add to the meat/sauce mixture.


     We love ricotta cheese, so I used a large spoon and placed "globs" of it over the top of the pasta. It almost looked like I was cooking dumplings.


Cover the top of the pasta/ricotta
mixture with a package of mozzarella cheese.


     Put the lid on your skillet and on low heat let the cheeses melt. We had ours with a salad and crusty bread. It is very easy and oh, so good!


     This is the pasta sauce I used. I bought it at Walmart and it did cost more than all the other sauces, but it was excellent and worth the extra money.


For dessert, I tried to keep it more 4th of July friendly.
I made my typical trifle. You can find the recipe for it here.
It is low fat to offset the pasta dish!


     I'm still trying to get into the mood for blogging. This heat and drought seem to have fried my brain. I don't feel creative and while I'm trying to get around to visit everyone, I am still behind on my visits. We have a trip coming up soon, so I may never get caught up...but, I'm trying! It was 104 today, our yard is dead and our plants are mostly gone even though we have watered them. Our fish died in our fountain (I think they cooked) and the cornfield behind our house is truly sad to see. I really feel for the farmers, the loss is major and the worst they have seen in many decades. I feel as if we should be stocking up on corn products now before the prices go up! I hope there is rain where you live!
    

Friday, September 16, 2011

Vegetarian Tuscan Stew


     As soon as the temperature changed, my desire to cook something also came back. Last weekend I decided to try to combine some fall flavors and make a meatless meal. We aren't vegetarians, but I think I could be if I could just hang on to bacon! We do tend to have a few meatless meals every week and I will make this again. I will warn you, it isn't a pretty soup as you will see from the final picture. This is a recipe you could easily change based on what you have in your pantry.

Ingredients:
1 bag dried pinto beans (rinse and soak in water for at least 2 hours)
1 large potato
2 celery stalks, chopped
1 large carrot, chopped
onion chopped (optional)
1 medium butternut squash, peeled and cubed
1 bag baby spinach, rinsed
1 tsp. (or more to taste) Italian Seasoning
salt
pepper
olive oil


     Drain soaked beans and place in large pan. Add chopped potato, carrot, celery and onion (optional). Drizzle with olive oil, add salt, pepper and Italian seasoning. Add water to cover the beans and simmer until beans and veggies are tender. You may need to add more water as the beans swell.


     While the beans are cooking, peel and cube butternut squash. I puncture mine with a knife and put it in the microwave for 2-3 minutes to make it softer and easier to peel.


     When the beans and veggies are tender, remove about half of the mixture and blend in food processor or blender until smooth. Add back to pot. Add the squash and spinach and continue to simmer until spinach has wilted and squash has almost melted into the soup. Add water as needed, this soup really thickens quickly.


     I made a loaf of no-knead crusty bread (recipe here), sliced it and drizzled it with olive oil. Bake the slices until brown at 350 degrees and serve with the stew.


I am joining Michael @ Designs by Gollum for Foodie Friday
Please stop to visit our hostess!

Monday, August 15, 2011

Celebrity Cook-Along, Recipe Blog Party and OTMM

     Every month, Lynn @ Happier Than A Pig In Mud hosts a Celebrity Cook-Along party. I finally had a recipe ready to share when she picked Rachel Ray as the Celebrity of the Month.


     My husband loves Shepherd's Pie, but I had never made it. So, when I saw Rachel's 30-minute Shepherd's Pie recipe, I decided to try it. It was easy to make and delicious. It takes a few pans to make, but other than a bit of clean-up, it was very simple to prepare.

30-Minute Shepherd's Pie
Ingredients:
2 pounds potatoes, peeled and cubed
salt and pepper
1 T. olive oil
1 & 3/4 pounds ground beef or ground lamb (I used beef)
1 carrot (or 2 smaller carrots) peeled and chopped
1 onion, chopped (I didn't use one)
2 T. butter
2 T. all-purpose flour
1 cup beef stock or broth
2 tsp. Worcestershire sauce
1/2 cup frozen peas
2 T. sour cream or softened cream cheese (I used lite sour cream)
1 large egg yolk
1/2 cup cream (vegetable or chicken broth may be substituted) I used the remaining beef broth and it was fine.
1 tsp. paprika


In a large pot, boil potatoes in salted water until tender, about 12 minutes.


While potatoes boil, heat a large skillet over medium-high heat. Add oil, then beef or lamb. Season with salt and pepper. Brown and crumble meat. If there is a lot of fat when meat is brown, drain it. Add carrot and optional onion, cook 5 minutes, stirring frequently.


In a second small pan over medium heat, cook butter and flour together, 2 minutes. Whisk in 1 cup beef broth and Worcestershire. Cook to thicken, 1 minute. Add gravy to meat mixture and stir in peas.


Drain potatoes and pour them into a bowl. Combine sour cream, egg yolk and broth or cream. Pour the sour cream mixture into the potatoes and mash until potatoes are almost smooth.


Preheat broiler to high. Fill a small rectangular casserole with meat and vegetable mixture. Spoon potatoes evenly over the meat. Top potatoes with paprika and broil 6 to 8 inches from heat until even browned, about 2  to 3 minutes. I actually baked mine for 40 minutes instead of broiling it. I liked the idea of cooking that raw egg yolk a little longer than just broiling the top.


I am also joining Debi @ Bloggerette Sorority for the Recipe Blog Party
and
Yvonne @ Stone Gable for On The Menu Monday


Friday, March 18, 2011

Cooking With No Kitchen-Foodie Friday

     I know blogs are supposed to be beautiful. We are supposed to only show our very best. We all live in perfect houses with beautifully set tables and amazing craft projects in our perfectly decorated "craft room"! NOT! Some of the best bloggers in Blogland would have been prepared for a couple weeks without the use of their kitchen. They would have created fabulous meals and had them ready to not only post online, but ready to pop out of the freezer every night for dinner. Well, that's just not me and I've always kept it honest around here!

     In truth, we have been eating carryout in styrofoam containers and having lots of cheese, crackers and Ramen Cup of Soup this week. Last night we wanted home cooking. My son was coming over and he loves tacos. I decided to give it a try, after all I have the stove and refrigerator working...just nothing else.

     I started with a casserole dish I could throw away. I used one saucepan and a few utensils to create my masterpiece. I meant to use paper plates for serving and out of habit I grabbed dinner plates (more work, bad idea). 

     I started with a layer of taco chips, broken and placed in the bottom of the pan. 


     I browned a pound of ground beef in my saucepan, drained it (that was tricky) and added a little water and a packet of taco seasoning. The meat went on top of the chips. 


     In the same saucepan (no sink, remember?) I warmed a can of fat-free refried beans and spread them over the beef.


     A package of shredded cheese and a few more broken chips finished it off. Into a 350 degree oven for about 45 minutes, until the cheese is melted and browning a little around the edges. 


     I topped each serving with shredded lettuce, chopped tomatoes, avocado and sour cream. My husband added a spoonful of salsa to his. 


     It was actually really good and under normal conditions would have been easy. It also required lots of steps to the basement wet bar to wash the vegetables, wash the dishes, bring up the can opener and the worst part for me is that all the "garbage" goes into a trash bag instead of a garbage disposal. Am I spoiled? If living with running water and garbage disposal in my kitchen makes me spoiled...you bet I am. Living without the countertops isn't all that impossible, living without a sink...horrible! We both decided that there will be more Ramen in our diet until the project is done! 


I'm joining Michael @ Designs by Gollum for Foodie Friday.
It is the place to find the recipes in all of Blogland!

Friday, March 4, 2011

Chocolates, Family and Pasta e Fagioli


     I'm sure many of you read Cooking With Paula Deen every month. I know I have purchased every issue since the magazine hit the market. If you have the current issue, I'd love for you to turn to pages 84-85 and read all about Lagomarcino's Soda Shop and their wonderful homemade candy. You see, I have a special interest in Lagomarcino's. My husband's first cousin Sandy, is married to Tom Lagomarcino. Tom and his sisters are the third generation to operate this fun, interesting and delicious business.


It is such a treat when the family gets together and the
 Lagomarcinos arrive with boxes of chocolate to share. 


     This time of year they are busy getting ready for Easter with their Chocolate Egg Pinatas. As a child, we had a local candy shop that made these and I can't tell you what a thrill it was to crack open a chocolate egg and have delicious assorted chocolates spill out. As an adult, I am seriously considering treating myself to one of Lagomarcino's perfect confections. In 2006 the family was honored with the James Beard Award and they have been featured in several magazines (they are mentioned in the current Midwest Living). They are a great family, talented candy makers and just nice people. They will ship those chocolates. Check out the website here.

     Now, on to a recipe for Foodie Friday. I'm joining Michael @ Designs by Gollum for this delicious weekly event. Check out her page for links to the best recipes on the web!


     I was looking through my recipe box last week trying to find something different to fix when I found my recipe for Pasta e Fagioli. It is great comfort food and easy to make.


Ingredients:
1 lb. pasta (cook as directed and set aside)
2 1/2 lb. Roma Tomatoes-skinned and chopped
1 onion chopped (optional)
1 can cannellini beans (rinsed and drained) I used Great Northern
1/2 lb mushrooms-sliced thin
1-2 cloves of garlic (I don't like garlic, so I substitute a little garlic powder)
1 tsp. each of thyme, rosemary and oregano
1/2 cup water
1 bag baby spinach
salt/pepper
olive oil
Parmesean cheese

Saute' the mushrooms, onion and garlic in olive oil 3-4 minutes, add tomatoes, beans, water, salt and pepper and simmer 15-20 minutes and add spinach. (I actually cooked mine longer-I like the flavors to have time to blend). Place pasta in bowl, top with sauce and sprinkle with cheese.


You can use any pasta you like,
I like to use bite sized pastas.


It was so hot it steamed up my camera lens!